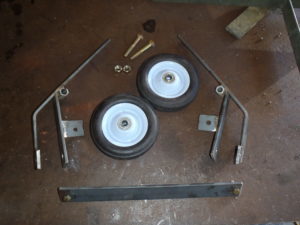
Whats in the kit?
Wheels with axle bolts, one crossbar with bolts and two new end sections that hold the wheels.
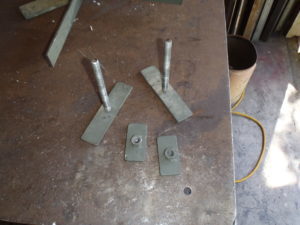
First remove the front feet, remember that is the part of the base that has the short section next to the welded on coupling nut….
Just grab the the foot and the handle and unscrew them, if need be tap it with a hammer to loosen the handle. The threaded section is welded to the foot so the only part that will come off is the handle.
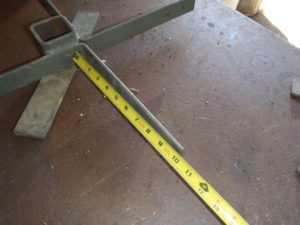
Next you are going to cut off the section of the base that holds the coupling nut where you removed the front feet.
When you cut it you want to leave approximately 10″ of the flat bar intact. Doesn’t have to be exact this isn’t rocket science…. Just be sure you are cutting off the front feet!
Note the location of the socket for the pillar in the picture, this also will tell you you are cutting off the correct side!
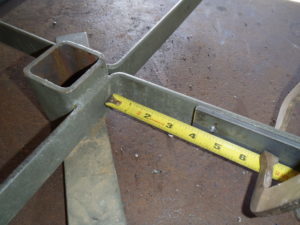
Put the foot into the new section to help you hold it against the remaining section of the flat bar. Measure out and center the hole in the new piece 4 and 1/2″ from the bend.
Use vise grips or clamps to hold it against the existing steel and line it up parallel before you drill the two 3/8ths holes. The other alternative is to weld it if you have the means to do so. But yes you do have to drill four holes in the existing base to attach the new section. It’s just mild steel so a new bit will essentially just go right through.
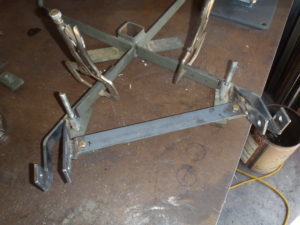
Install the cross bar…. Just line up the holes and bolt it on. No need for washers as the supplied nuts are lock nuts.
Tighten all the bolts and install the wheels with the supplied bolts and you are good to go! Oh yeah, remove your clamps!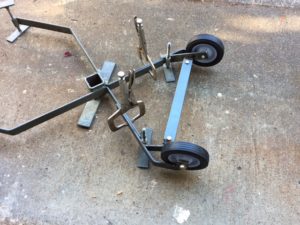
All you have to remember when you want to move the target is to install the lockpin on the knockdown mechanism, put your foot against the new crossbar between the wheels and pull towards yourself with the head plate.
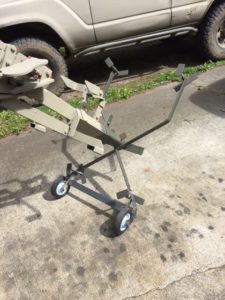 Once you are at a new spot, just put the target back down and the wheels just lift out of the way as the feet once again touch the ground.
