
 The KTAK target is designed to be simple to set up, operate and adjust. Re-setting the target after shooting only takes some muscle power to lift it back into place. While adjustments to the linkage requires only simple tools.
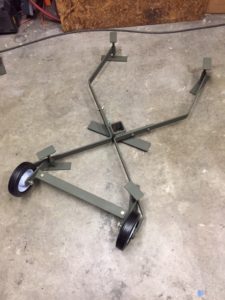
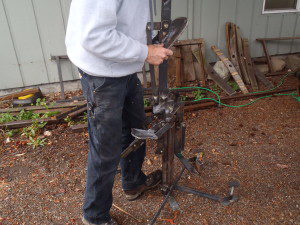
1) Place the base on the ground with the longer legs away from the shooter. Center foot must touch the ground! On the newer versions the wheels will be towards the shooter.
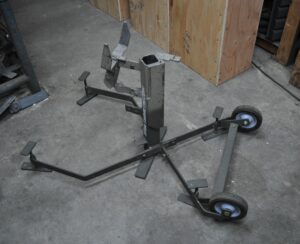
2) Insert the Pillar with the “fork” and drop linkage away from the shooter.
3) Install the lockbolt that is below the foot stop on the pillar. (Optional)
4) Adjust the Base, This is essential!
Run all four feet down to the ground but not so hard you raise the center pillar off the ground
Use the adjustable feet to set the pillar vertical when viewed from the front. Does not have to be perfect just get it as close as you can.
When viewed from the side the pillar must have a slight backward lean. When setting the back lean ensure the center foot of the base remains in contact with the ground. Use the 4 (front and back) adjustable feet to do so.
If the pillar doesn’t have the slight back lean, loosen the back feet and tighten the front feet the same amount. You can also remove too much lean by reversing the process.
5) Insert the Upper Torso with the stake pockets on the front side of the pillar, towards the shooter. Crossbar will rest on top of lift stop
6) Remove the Orange transport lock pin.
It has the red flag on it (You can attach the pin to the tab provided right below the drop trigger on the pillar)
7) Flip the hip lock loop down so the upper torso will pivot.
Lean the upper torso back slightly to get past the stop at the top of the pillar. This will allow the upper torso to drop into place. After it drops into place, stand the target all the way up and flip the hip lock back up into place.
8) Insert the 32” wooden stakes into the pockets. A hammer may be needed as the stakes should be a snug fit in the pockets since the target will be falling back.
9) Staple cardboard to stakes, cardboard should conceal all strike plates. I use a cardboard target that is 18” W x 30” H. Basically a modified IDPA or IPSC target will work just fine.
10) Cover the cardboard with a t-shirt. The weight of the shirt affects the balance… Unfortunately sweatshirts are not an option.
Shooting in the Rain
The added wetness of a shirt will change the set up of the target. If you find yourself training in the rain, cover the shirt with a plastic bag or use a waterproof target in its place.
You will also find water to be an amazing lubricant on steel. If you shoot the target in the wet, you may have to tighten things up. And remember to loosen it up to use it dry as once the water is gone it will be really tight.
Fire Some Test Rounds
The target is shipped with the linkage set to take 3-4 rounds of 45ACP to the center mass plate to knock it down. This initial setting is also a good starting point for rifle rounds but you will need to adjust it if you are using a smaller caliber pistol such as a 9mm
The target should fall with the set number of rounds, 3-4.
If not….
If it falls too easy it may have too much backwards lean
If it takes too many rounds to fall it may require more back lean or an adjustment to the linkage.
Adjusting the Round Count
Increasing or decreasing the required number of rounds needed to knock it down is easy. But do think in general numbers of rounds not an exact count as there is some variability in the rounds required to knock it down. Essentially some hits count more than others much like the real world. Usually this variability is only + or -1 round.
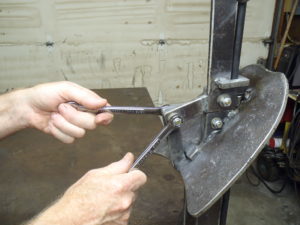
1) To decrease the round count, slightly loosen the linkage bolts on the back side of the target.
To increase the round count slightly tighten the four linkage bolts that control the mechanism. These are the 3/8th bolts with the washer stacks on the head plate pivot, two on the linkage rod and the release bar pivot. (Do not remove the washers, the stacks of washers are an integral part of the function….) It is only these four bolts that control the round count.
You will need two 9/16th wrenches to do this. I tend to keep the tension on all four pivot bolts between the head and drag bar, the same. All adjustments are made in small increments, less than a 16th of a turn with the wrenches.
Tension on the bolts is easy to feel when you remove one of the wrenches then turn the bolt with the remaining wrench, it should have drag to it as you turn the wrench. No drag it’s too loose and can’t turn it, too much drag.
Using Light Calibers
There are two ways to adjust for the lighter calibers, 9mm, 38 Special, 357 Sig, etc.
The best way to make adjustments is by decreasing the tension on the linkage in very small increments. Meaning loosen up the four bolts between the head/neck pivot and the release bar.
2) The other option is to increase the back lean of the center pillar if you are using mixed calibers and want to speed things up a little.
Fire some test rounds to ensure it is dropping with the number of rounds desired.
Ready for Use
This completes the primary set up of the target, it is now ready to use. But this is not the only way the target can be set up. There are some additional no tool set ups for more options in your training.
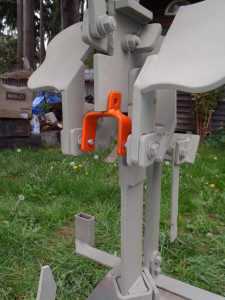
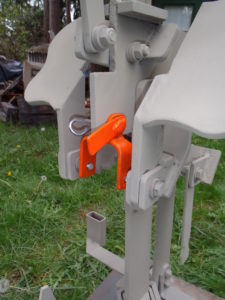
Hip Shot Lockout/Maintenance Loop
This feature serves two purposes. When flipped up it can be incorporated in training. And when you install the safety pin the target is locked up so you can transport it without getting pinched by moving parts.
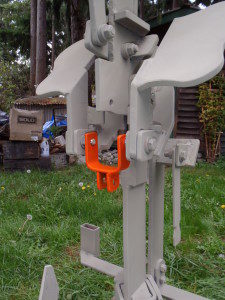
When flipped up it is designed to simulate a hard to stop target. It’s great for drug and body armor drills. And it is extremely easy to engage. When engaged this locks the head and center mass plates and prevents the target from falling back until you hit either plate of the pelvic girdle.
1) Ensure the hip plates are all the way forward
2) Rotate the “U” shaped bar (it hangs between the hip plate pivot bolts) upward to prevent the target from falling back. See Fig 5
A single shot to either hip plate unlocks it and activates the drop mechanism, allowing you to knockdown the target as usual.
This loop is also your maintenance and safety lockout for adjustments and transport. Flipping it up prevents the target from falling on you while you make adjustments to the linkage.
Inserting the lockpin for transport ensures your hands and fingers don’t get pinched by preventing movement of the upper torso components.
Secondary Lockout
You will see a secondary hole on the drop sear, This hole is to insert a bolt or the lockpin to prevent the upper pillar from dropping during maintenance, It can also be used for a hard lockout of the hip drop but still allow you to shoot the hip plates without getting a drop of the upper pillar, hip plates will still flip down if hit.
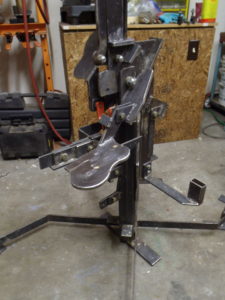
Target Reset
After the upper torso has been knocked down the target is simple to reset.
1) Lift the upper torso section back up to vertical using only the head strike plate.
2) Once the target is vertical, ensure the head plate is cocked all the way forward (towards the shooter) This re-engages the multiple shot feature of the target.
If the drop mechanism was activated the hip plate will be flipped down
1) Look at the hip plates. If the hip plates are laying on top of the fork, first flip them back up into place. See Fig 7
2) If they have pivoted past the fork leave them there, you will re-set them later in a later step. See Fig 8
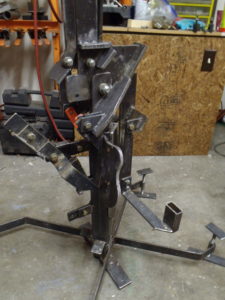
3) Stand behind the target and lift it back to the upright position. See Fig 9
4) Place one foot on one of the tabs on the bottom of the pillar base.
5) Lift the upper torso using the bottom of the center mass plate until it hits the stop on the front of the pillar, then pause.
6) This will allow the drop trigger to reset. Sometimes a gentle shake is needed get the vertical drop trigger to fall into place.
7) Ease the torso down slowly to ensure the drop trigger has reset
8) Rotate the hip plates all the way forward if needed
9) Ensure the upper section of the “fork” is rotated back into position as well but don’t push too hard or you will activate the drop feature of the target. You can also leave the fork back and this will prevent the hip plates from activating the drop feature.
Questions and Input
Please call if you need to, even in the middle of a shoot. If the target is giving you trouble I want to know about it, so I can solve it. Cell Ph. 360-969-9167 Even if I don’t answer, leave a message and I will call back.
And the same holds true for giving me your input. Don’t hesitate to make suggestions as feedback from the guys using the target is really important and helps me build better targets.